Upload File in Ionic 4 With Native Http
by Didin J., updated on ส.ค. 16, 2019 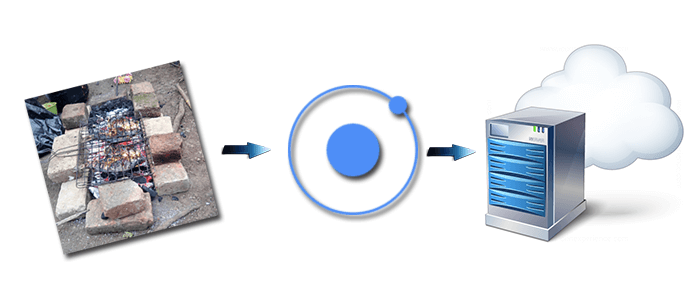
This tutorial shows yous how to upload the file to the server on Ionic 3 and Cordova using Ionic native file transfer plugin. It can store any files type to the server depends on file types that allowed by the server, merely this time we will use an image file that taken from camera or certificate folder of the device. So, we volition use another Ionic 3 native plugin that is Photographic camera plugin. In our feel of storing file that uploaded from Mobile Apps save in server path, relieve in database table as a base64 string or outside of server for example to Amazon AWS S3. The location of the uploaded file save is handled by server or web server, in this tutorial we did not encompass that. Then, we are using our ain Grails 3 application as the file server for this tutorial. The image file that uploaded will relieve inside the images folder of the root server URL.
Shortcut to the steps:
- Create New Ionic 3 and Cordova App
- Install and Configure Camera, File and File Transfer Plugin
- Create Upload Page and Controller
- Test Upload Image File using Android and iOS Device
Ionic File Upload is one of the essential features in mobile apps development. Almost mobile apps have a feature of upload image, avatar, document, etc. In this tutorial, we will have a combination of Ionic Cordova File Transfer, Image Picker from the Photographic camera or Library, and other required modules.
You can also larn and try these related tutorials:
- Node.js, Express.js, and Multer.js REST API for Image Uploader
- Ionic 3, Athwart v, and Cordova Base64 Prototype Uploader
- Ionic 4, Athwart, and Cordova Crop and Upload Image
Because nosotros merely show y'all on how to upload the file from mobile apps, that'due south mean the file uploaded from Android or iOS apps. That's why we're using the native file transfer plugin. The following tools and requirements should set up before starting the tutorial.
- Node.js
- Latest Ionic 3 CLI
- Latest Cordova
- Terminal (Bone 10, Linux) or Node Command Line (Windows)
- Text Editor or IDE (eastward.thou. Atom, Netbeans)
After Node.js installed and able to run on Last or Node command line, run this command on the terminal or Node control line.
sudo npm install -g ionic cordova On MS-Windows Node command line 'sudo' is not necessary. That command volition install latest Ionic 3, Ionic CLI and Cordova.
Create New Ionic 3 and Cordova App
Nonetheless, on the terminal or Node command line, blazon this command to create new blank Ionic 3 and Cordova app.
ionic start ionic-file-upload blank It will take a few minutes because information technology too runs 'npm install'. As you can see on the terminal line of the terminal, go to the newly created projection folder.
cd ionic-file-upload As usual, to brand sure that Ionic iii app working properly, run the app past type this command.
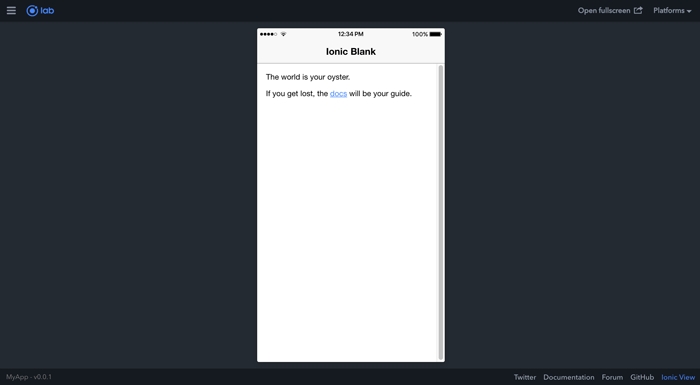
ionic serve --lab It will automatically open the default browser and evidence Ionic app page.
Install and Configure Photographic camera, File and File Transfer Plugin
What we need in our Ionic 3 and Cordova apps is the function to browse or take image file and so send or upload the file to the server. To achieve that we use the combination of Camera, File and File Transfer plugin. All of that plugin is Ionic Native plugins. To install the plugins blazon the following commands.
ionic cordova plugin add cordova-plugin-photographic camera npm install --save @ionic-native/camera ionic cordova plugin add cordova-plugin-file npm install --salve @ionic-native/file ionic cordova plugin add together cordova-plugin-file-transfer npm install --save @ionic-native/file-transfer Open and edit 'src/app/app.module.ts' and then add this import.
import { FileTransfer, FileUploadOptions, FileTransferObject } from '@ionic-native/file-transfer'; import { File } from '@ionic-native/file'; import { Camera } from '@ionic-native/camera'; Add those imported course into '@NgModule' providers.
providers: [ StatusBar, SplashScreen, {provide: ErrorHandler, useClass: IonicErrorHandler}, FileTransfer, FileUploadOptions, FileTransferObject, File, Photographic camera ] At present, the File and File Transfer plugin is ready to utilise the Ionic 3 app.
Create Upload Page and Controller
Next, nosotros volition utilise the existing generated page 'src/pages/home/home.html' and 'src/pages/home/home.ts' for uploading the image file. First, open and edit 'src/pages/home/home.html' then replace '<ion-content>' contents with this.
<ion-content padding> <ion-detail> <p>{{imageURI}}</p> <push button ion-button colour="secondary" (click)="getImage()">Get Epitome</push> </ion-item> <ion-item> <h4>Image Preview</h4> <img src="{{imageFileName}}" *ngIf="imageFileName" alt="Ionic File" width="300" /> </ion-particular> <ion-detail> <button ion-button (click)="uploadFile()">Upload</button> </ion-detail> </ion-content> Which a button that triggers Prototype picker, an prototype preview, and a button that trigger Ionic paradigm upload. 2d, open and edit 'src/pages/domicile/home.ts' then add these imports of Ionic Angular LoadingController, ToastController, Native FileTransfer, FileUploadOptions, FileTransferObject (@ionic-native/file-transfer), Camera, and CameraOptions (@ionic-native/photographic camera).
import { NavController, LoadingController, ToastController } from 'ionic-angular'; import { FileTransfer, FileUploadOptions, FileTransferObject } from '@ionic-native/file-transfer'; import { Camera, CameraOptions } from '@ionic-native/camera'; Add together variable earlier constructor for belongings image URI.
imageURI:whatsoever; imageFileName:any; Inject all plugin that imported to the controllers.
constructor(public navCtrl: NavController, private transfer: FileTransfer, individual camera: Photographic camera, public loadingCtrl: LoadingController, public toastCtrl: ToastController) {} Add together this part to get Image from Photo Library.
getImage() { const options: CameraOptions = { quality: 100, destinationType: this.camera.DestinationType.FILE_URI, sourceType: this.camera.PictureSourceType.PHOTOLIBRARY } this.camera.getPicture(options).then((imageData) => { this.imageURI = imageData; }, (err) => { panel.log(err); this.presentToast(err); }); } uploadFile() { allow loader = this.loadingCtrl.create({ content: "Uploading..." }); loader.nowadays(); const fileTransfer: FileTransferObject = this.transfer.create(); permit options: FileUploadOptions = { fileKey: 'ionicfile', fileName: 'ionicfile', chunkedMode: imitation, mimeType: "image/jpeg", headers: {} } fileTransfer.upload(this.imageURI, 'http://192.168.0.vii:8080/api/uploadImage', options) .then((information) => { console.log(data+" Uploaded Successfully"); this.imageFileName = "http://192.168.0.7:8080/static/images/ionicfile.jpg" loader.dismiss(); this.presentToast("Image uploaded successfully"); }, (err) => { console.log(err); loader.dismiss(); this.presentToast(err); }); } Likewise, add Toast Controller for display whatsoever error bulletin.
presentToast(msg) { let toast = this.toastCtrl.create({ bulletin: msg, duration: 3000, position: 'lesser' }); toast.onDidDismiss(() => { console.log('Dismissed toast'); }); toast.present(); } That'southward the minor piece of codes use for getting and upload the image file.
Test Upload Image File using Android and iOS Device
Yous can use our Grails iii uploader app or your own backend for the test this app. Make certain your server or backend run and File Transfer URL point to your server.
Now, install or reinstall Android and iOS Cordova platforms by typing this command.
ionic cordova platform rm android ionic cordova platform add android ionic cordova platform rm ios ionic cordova platform add ios Next, we run the app on an Android device past typing this command.
ionic cordova run android You will meet this default page when the app starts on an Android device.

Click on Get Paradigm button the select Image file in the gallery or certificate folder and then click the upload button.

Next, we run the app on iOS simulator by typing this command.
ionic cordova run ios Exercise the same thing every bit Android on the app.
That it's, If you need the source lawmaking, you can detect it on our GitHub.
We know that building beautifully designed Ionic apps from scratch can be frustrating and very time-consuming. Check Ionic 4 - Total Starter App and save evolution and blueprint time. Android, iOS, and PWA, 100+ Screens and Components, the most consummate and advance Ionic Template.
That just the basic. If you need more than deep learning virtually Ionic, Athwart, and Typescript, you tin take the post-obit inexpensive course:
Cheers
doylehasheivates38.blogspot.com
Source: https://www.djamware.com/post/599da16580aca768e4d2b130/how-to-upload-file-on-ionic-3-using-native-file-transfer-plugin
0 Response to "Upload File in Ionic 4 With Native Http"
Post a Comment